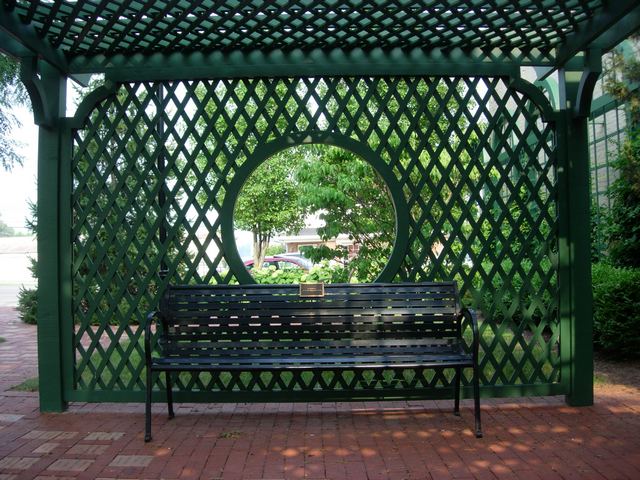
The above picture in a recent Culver Citizen caused a “blast from the past”, reminding me of our work on Heritage Park when it was first constructed back in 1997. We were commissioned to build the trellis panels and the arbor. The design was created by Mark Holeman (Mark M. Holman, Inc.) and was all custom sized and dimensioned. Mr. Holeman even custom sized the lattice which was constructed in a square pattern in lieu of the standard diagonal pattern. This was our first project with Mr. Holeman, but we have since worked with him on several projects around Culver and in other locations.
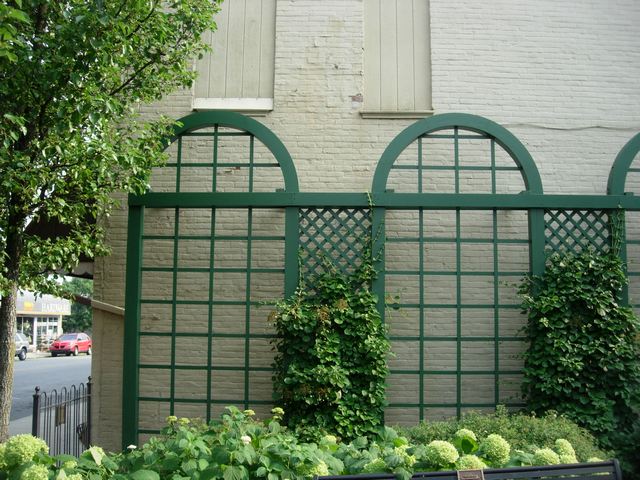 Richard Fisher of The Antiquarian and Historical Society of Culver coordinated various contractors to complete the park, so we were only involved with the carpentry. At that time our best carpenter for this kind of work was Ansel “Uncle Bud” Cripe. He was semi-retired and only working on custom woodworking projects such as cabinetry, railings and such. He was in his late seventies, turning 78 in September of ’97. He mumbled and groaned about the project, shaking his head, uttering an occasional signature “lawzy!” as he went through making patterns, gluing multiple layers to create the curved tops on the trellis panels and working through the intricacies of mounting the circle within the custom lattice for the arbor.
 Per Mr. Holeman’s specifications, all of the wood used was redwood. Also per specifications it was all #1 clear redwood. This made the material costs high. There was no margin for error! Fasteners were non-staining, exterior grade. The glue and fillers also had to be exterior grade. Everything was built in sections at our shop. One of our crews assembled the pieces on site under Uncle Bud’s direction. Throughout the entire project, Richard Fisher was never far from the process. He came to our shop to review the progress and was also on site when the assembly was completed.
As with most carpenters, Uncle Bud loved working with high quality wood and he treated this project with reverence and respect. He spoke of it with pride in subsequent years, though he could never understand why they took that beautiful clear redwood and painted it green! Sacrilege! Particularly after he had carefully fit joints and hidden fasteners since the original plan was to only apply a clear sealer.
 If you would want to support Heritage Park through the purchase of a commemorative brick, the Antiquarian and Historical Society of Culver has them for sale here. Bricks are available in single and double sizes. You can find a map of brick locations and a copy of Mark Holeman’s original site plan here.
Unfortunately both Uncle Bud and Richard have passed away. They are each unique characters from our past that are missed.