Simple Sound Proofing
I’ve been remiss on posting tips lately. There has been a lot going on! With the construction underway on the Sand Hill Farm apartments, I thought I would share a few simple sound proofing solutions we are using on this project. Most of these are green solutions as well as sound proofing.
2′ Stud Spacing:
First, we have used 2′ spacing on studs wherever possible. On the green side, every stud removed from the project is a savings of cost and and material. Literally hundreds of studs were removed from the project through this reduction of studs as well as doing things like using California Corners. Sound travels more easily through hard surfaces. By eliminating the number of studs we’ve eliminated the sound transfer points. On the exterior, this has the other benefit of allowing more insulation. Just as the studs transfer sound, they are more efficient at transferring heat. Every stud removed is one less heat transfer point as well. That stud space is filled with insulation. We are using 2×6 exterior wall framing which allows for additional insulation.
On the inside, it is more directly sound transfer. We have continued to use 2′ centers wherever possible. This helps sound transfer throughout the building.
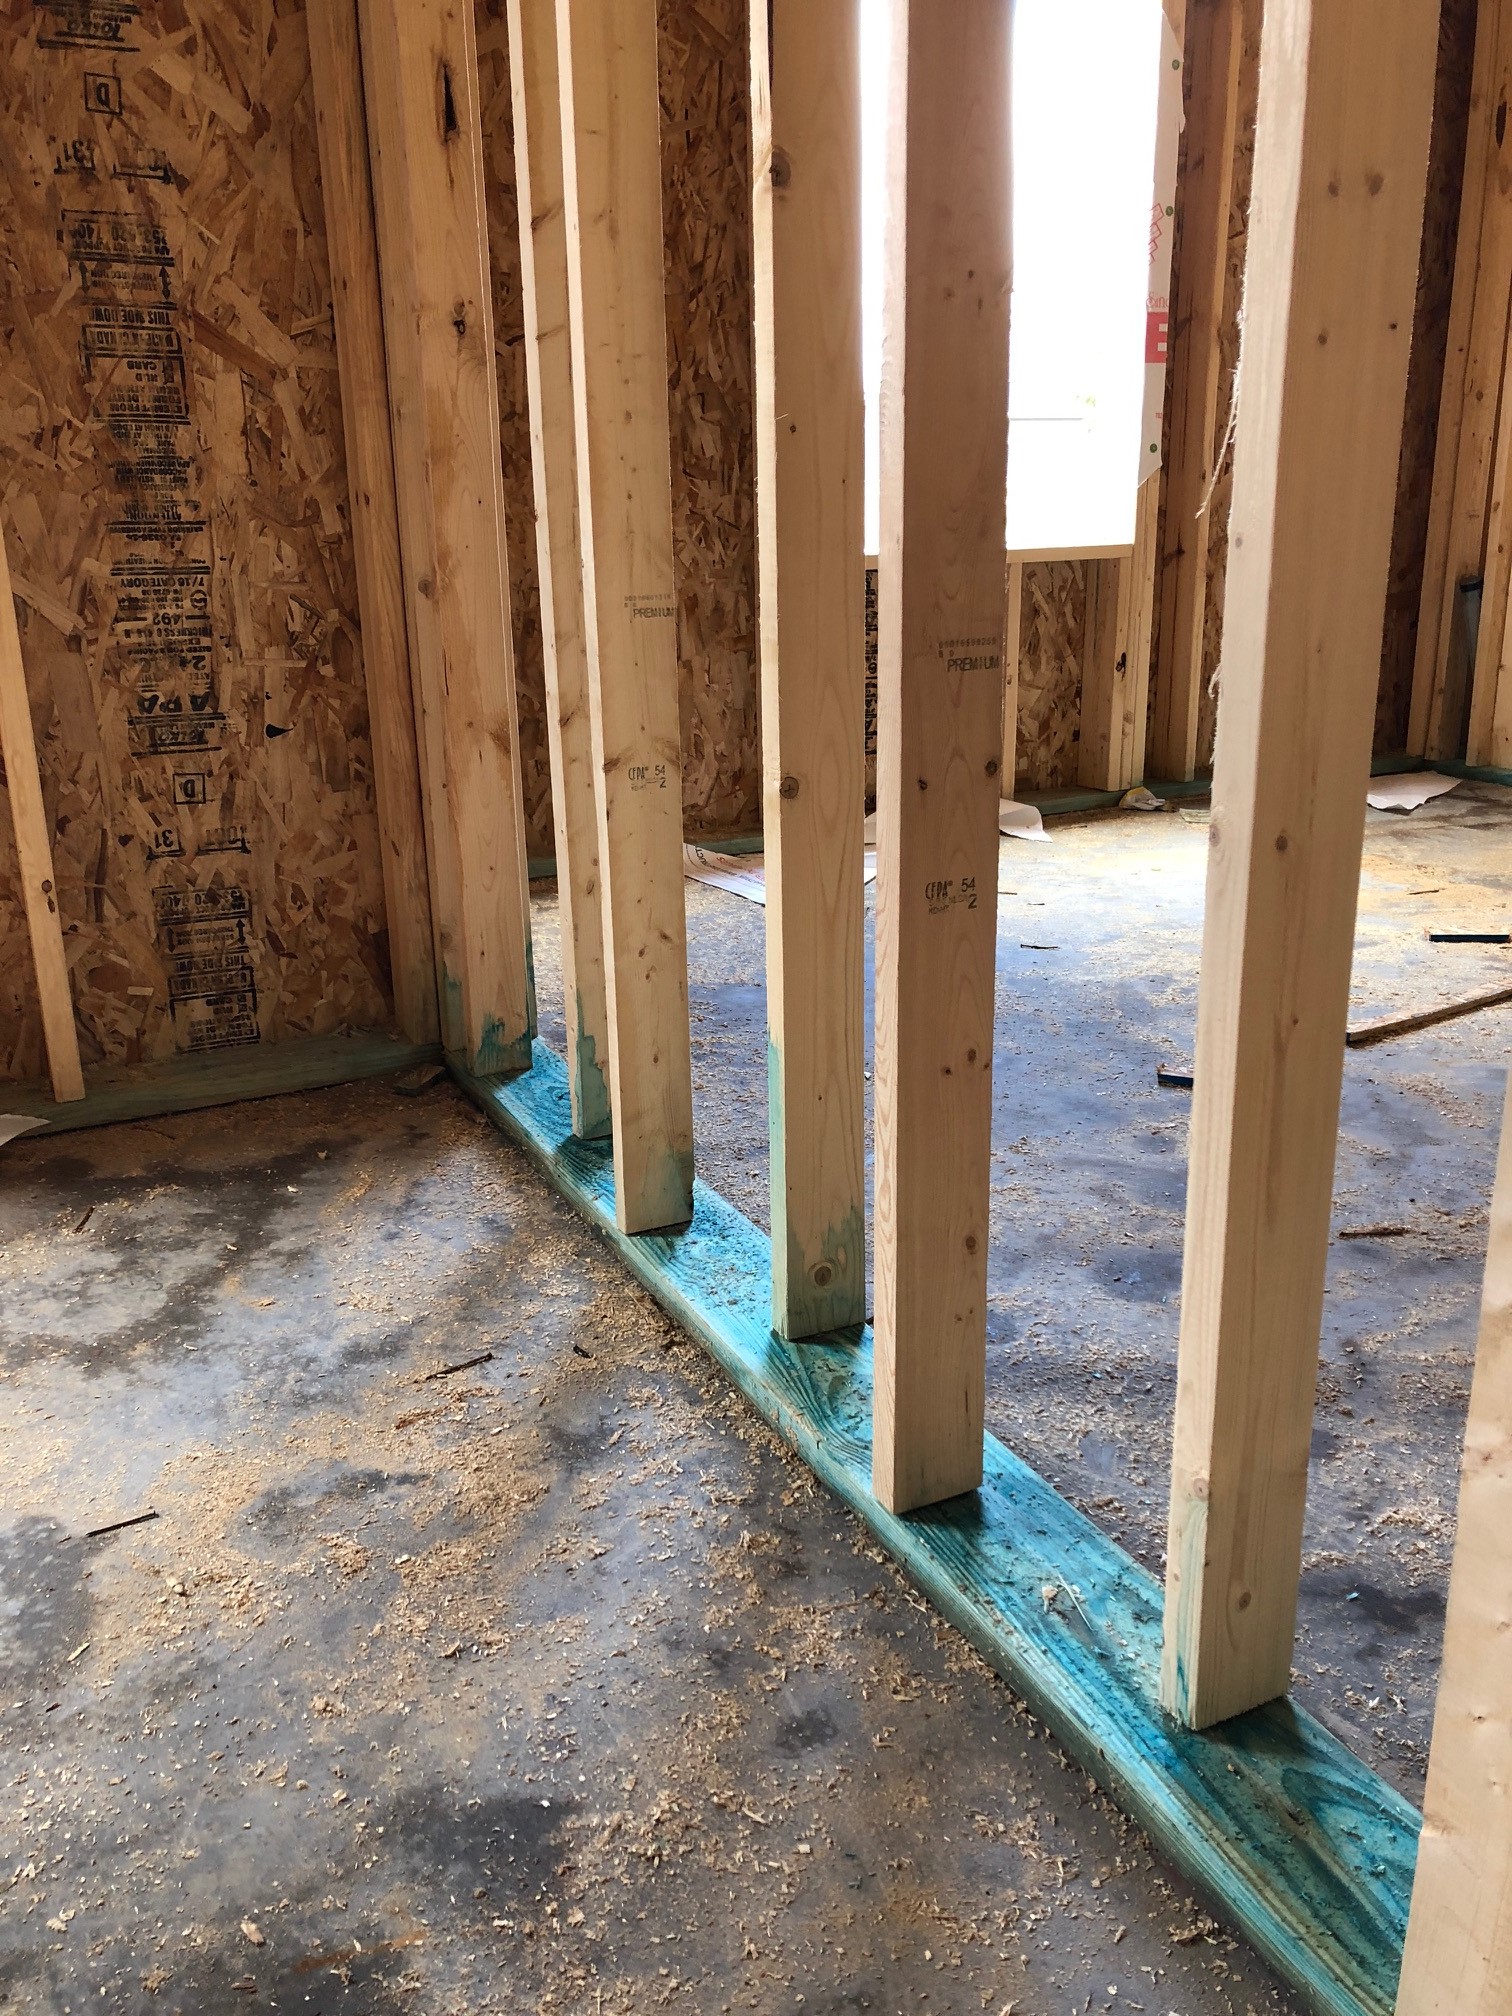
In the walls between the units we are not only using 2′ centers, but we are using a staggered stud wall. This is done by using 2×6 top and bottom plate and then staggering the studs from one side to the other every 12″. In the picture to the left, you can see the green (treated) 2×6 base plate and the staggered 2×4 studs attached to it. This effectively give you 2′ centers on each side and reduces the direct connection for sound transfer to the top and bottom plates. We will then weave sound batt insulation between the studs for additional sound deadening. There are a few exceptions where a 2×6 column is required, but in the majority of these adjoining unit walls, the staggered stud configuration is continuous.
Open Web Floor Trusses
The floor trusses between the first and second floor are open web trusses. Using open web trusses reduce those hard service transfer points that you would have with standard dimension lumber or even with I-joist. The other advantage to the trusses is we can increase the spacing from the standard 16″ spacing used for solid wood to 19.2″ on centers. Sound batt insulation will be placed between the trusses to further reduce sound transfer.
Before the drywall is installed on the ceilings, we are installing sound dampening channels. These are Z shaped channels that run perpendicular to the floor trusses. The changes the hard surface connection to just the 3-4 square inches at each channel to truss connection. The Z shape of the channel allows some minimal flex which again will absorb some sound.
5/8″ Drywall Walls
Normal residential construction would have 1/2″ drywall on the walls and 5/8″ drywall on the ceilings. We are using 5/8″ drywall throughout. The additional mass will not only provide a more durable surface when spanning the 2′ stud spacing, but it will also help reduce sound transfer.
Sound dampening Underlayment
All of the floors on the second floor will be laminate. This was chosen after talking to several realtors. The number of people having allergy issues has increased and this has increased the popularity of hardwoods and laminate floors. Hardwood floors tend to transfer sound though. Laminates reduce that. We have chosen a laminate plank flooring that will simulate a hardwood look, but absorb more sound. In addition to this, using this material allows us to put down a sound dampening underlayment beneath the laminate planks adding one more layer of sound protection. This system has the added benefit of being nearly impermeable to water.


