Coffee Maker Protection

Before

If you work in a large office you generally have one of the large commercial coffee makers such as a Bunn or a Bloomfield as shown here.  If you’ve been around these then you know they put out a lot of excess heat.  In the case of this unit, the heat was sufficient that it was actually causing the counter top laminate to delaminate.  As you can see here, there was not a lot of distance between the top of the unit and the upper cabinet to add protection.  The solution?  An 18″ x 18″ floor tile.  Durable, heat resistant and not thick enough to cause any problems with the upper cabinet.

After

The tile was selected in a color similar to the counter top, though it is close enough to the coffee maker size that this wasn’t critical.  The tile has ridges on the back designed to help with grout adhesion.  In this case, those ridges help by creating additional air space and surface area to dissipate heat. Self-adhesive furniture pads were used on the bottom of the tile to create additional air space and prevent the tile from scratching the laminate when it is moved for cleaning.  All in all, a simple, economical solution to a common problem.

Kitchen Storage Tips

Often the reason for remodeling a kitchen is to gain more storage space.  It’s not always possible to increase the square footage of the kitchen, so you are working with the same floor space and same wall space.  When you select your cabinets, consider adding these cabinet accessories:

  1. Image borrowed from Artisan SpecialtiesInternal lazy susans: These spinning conveniences come in a variety of shapes, like the classic circular design, kidney-shaped and half-moon.  (See the picture to the right.)They take advantage of space in the back of corner cabinets that is often blocked off.
  2.  Image borrowed from myhomecreation.comSlide-out shelves: Deep cabinets are great if you can see and reach all the way back, but at less ideal angles, your kitchen supplies may never see the light of day again. Installing shelves that slide out eliminates this issue by bringing the far-back section of the shelf to you — think of it like a shallow drawer built in to the cabinet.
  3. Image Borrowed from Gala Dining RoomSwivel-out shelves: Like the love child of a lazy susan and a slide-out shelf, swivel-out shelves work great for maximizing cabinets built into awkward corners. (See the picture to the right)  In many ways, this is even better than the internal lazy susan, since it brings the shelves out where you can see everything on them.
  4. Image borrowed from woodweb.comPull-out cabinets: Like big drawers made of stacked shelves, pull-out cabinets give you the storage of a deep cabinet with more accessibility than a pantry.
  5. Image borrowed from beeboats.comPartitioned drawers:
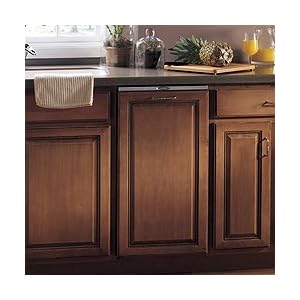
 Tall, deep drawers are rarely fully utilized. They’re either left half empty or you never see the stuff at the bottom. Adding in partitions or built-in dish racks let’s you pack ’em full and find everything inside.
  6. Cabinets with drawers: More serious — and more versatile — than just slide-out shelves, drawers built into cabinets let you take advantage of extra space in a big cabinet or store important pieces next to their larger counterparts (like a drawer of lids built into a cabinet full of plastic containers).
  7. Image borrowed from thisoldhouse.comCabinet door extras: Deep cabinets with room to spare in the front are a great place for built-in bins and hooks on the inside of cabinet doors.
  8. Image borrowed from Amazon.comHidden appliances: If you’ve got some extra cabinet space, consider remodeling cabinets to hide certain appliances. From trash compactors (see picture at the right) to wine coolers, dish washers to refrigerators, there are plenty of appliances that can be made to blend right in with the rest of your cabinets. A countertop-level cabinet with an outlet in the back can keep blenders, food processors and coffee makers plugged in, accessible and out of plain sight.

If you want to get REALLY creative or have already maxed out everything you can do with common features, consider these ideas:

  1. Image borrowed from Schuler Cabinetry websiteBuild corner drawers.  Right now, you likely have dead space where cabinets meet at 90-degree angles. Your existing cabinets can be modified to make use of deep, dead-corner spaces by building custom angled drawers.  This will require a skilled finish carpenter, but in a tight space, the expense can be worth it.
  2. Create custom drawers or shelves.  While the lazy susan is an improvement over leaving inaccessible dead space, it still creates unusable voids.  (The opposite problem to putting a square peg in a round hole.)  Replace your inefficient lazy susan storage with custom drawers or roll-out shelves that are specially designed to hold spices, pots and pans, and other frequently used wares that don’t fit neatly into standard spaces.
  3. image borrowed from uneedhardware.comAdd a pull out pantry.  Custom cabinet makers can build specialty lengthwise drawers to fit in a space as narrow as five inches, as tall as 80 inches or more, and fit the depth of your cabinets.  Although narrow, such pullouts can accommodate regular pantry fare, such as cereal boxes and soup cans.
  4. Grab wall space.  Make use of the shallow space between wall studs for shelves perfectly sized for spices, olive oils, and vinegars. If you’re an avid cook, you’ll love having these essentials at your fingertips, easy to see and reach.  Remember though, in a remodel project you may find surprises in those wall cavities.  There may be wiring, plumbing vents, HVAC runs or other infrastructure hidden in the wall.  It is best to make an unobtrusive exploratory hole to see what you’re getting into before getting out the sledge hammer and bashing holes.  Also remember that if this is an exterior wall, it should be insulated.  Not only will you lose insulation value by removing it, but you could create a drafty cold spot.
  5. Image borrowed from seedsandfruit.comHide it in the floor!  Though an uncommon solution, in a truly cramped kitchen storage can be gained by adding a trap door in the floor to access the space between the floor joist for storage.  Obviously not for your everyday items, this storage idea can gain a space approximately 10″ deep by 14″ wide by whatever length you choose.  This isn’t something that you can do with a ceramic tile floor, but some other flooring finishes are conducive.  As with the stud space storage discussed above, it is important to remember that there may be infrastructure currently using that space for which accommodations will be necessary.

These tips are based on information from ImprovementCenter.com, though many of these ideas have been implemented by Easterday Construction in past projects.

Tube Elevator

PVE52 Vacuum Elevator

I think this elevator has a lot of potential due to its small footprint, but I’m a little disconcerted by the similarity to the drive-up window tubes at a bank.  Ha!  It appears to only go up and down and not travel horizontally across the ceiling, but then you never know!

This is a vacuum lift from Pneumatic Vacuum Elevators, LLC.  It is a self-supporting structure with a footprint of only less than 53″.  This still provides an internal cab diameter of 43″.  It can rise up to 35′ and have up to 4 stops.  Door openings can be arranged in line or at 180 degrees.  It requires no mechanical room and no added headroom.

A standard lift requires a constructed shaft with an interior dimension as large the exterior dimensions of this one.  That could be an advantage in the residential applications that this is designed to accommodate. 

Often we use stair climbing lifts in residential applications.  This is fine for homes with wide stairs and for users that are still ambulatory.  Unfortunately that option doesn’t work well for someone who is wheelchair bound.  There is no way for the rider to move the chair from floor to floor.

The Pneumatic Elevator is a aesthetic and life style choice.  The cost is similar or greater than a standard cab style chairlift elevator.  it would be something to consider in the right application, but it is designed to be a feature and not something hidden or disguised as is often the goal in home elevator installations.


Energy Saving ROI’s

Nest Thermostat
$249 at Amazon

A couple of weeks ago I discussed the Nest Thermostat.  (See that article here.)  One of the questions I have when I see something like this is whether there is return on investment (ROI) or in the case of green technology, is it Green That Saves Green?

According to Remodeling Magazine a programmable thermostat has a payoff in 1-10 years depending on the thermostat installed and the situation in which it will be used.  I’ve included some bare bones excerpts here, but for the complete article, check out page 40 in the November 2012 issue of Remodeling Magazine here.

Programmable Thermostat – Materials: $50-$350, Labor: 1-3 hrs, Estimated ROI: <1yr – 10yr

Low Flow Faucets & Fixtures – Materials: $1-$500+, Labor: 15 min – 4 hrs, Estimated ROI: <1yr – 5yr

Tankless Water Heater – Materials: $1,500-$3.500, Labor: 4-8 hr, Estimated ROI: 5yr – 15yr

Air Sealing – Materials: $50-$6,000, Labor: 4-40 hrs, Estimated ROI: <1yr – 8yr

Insulation – Materials: $200-$10,000, Labor: 4-100 hrs, Estmated ROI: 5yr – 15yr

On Demand Circulation Pump – Materials: $50-$150, Labor: 4-6hrs, Estimated ROI: 1yr – 2yr+

* The labor estimates above do not include travel time.

Nest Thermostat

It’s pretty well known that an easy way to save energy (and money!) is to turn your thermostat down.  To do this without being there, the choice has always been the programmable thermostat.  These come in several varieties with the ultimate being a seven day programmable stat which allowed you to program different settings for weekdays and weekends.  The problem has always been the programming.  Even on the best of these units, it wasn’t easy.

The Nest Thermostat has eliminated the programming part of this equation by introducing a learning mode.  Yes, it saves time and money by learning your household patterns and programming itself.

On top of the self-programming features, if you have a wireless network, the device can be accessed from the web through your computer or smart phone.  Forgot to set it to vacation mode before you hit the road?  No problem.  Making a quick trip up to the cottage and want it warmed up or cooled off before you get there?  Easy!  Wake up in the middle of the night with that bad feeling about pipes freezing at the cottage?  Log on and check it out!

Now in it’s second generation, the Nest thermostat is sleek and stylish.  It doesn’t look like your typical thermostat and it catches your eye with it’s cobalt blue face and reflective metal surround.  The second generation has added more compatibility with different types of heating and cooling systems, it has reduced the depth of its profile and it is still available for $249 at Amazon.com  Not exactly a cheap device, but it does a lot!

Lennox offers their Icomfort Wi-Fi touchscreen thermostat which takes advantage of remote monitoring as well.  It provides the accessibility, but not the learning functions or the accessibility to as many other heating and cooling systems available with the Nest.  It’s not quite as stylish in my opinion.  It is also more expensive, listed at $299 at Bonanza.com

In either case, in the long run, I think this is Green That Saves Green.  If you aren’t using a programmable thermostat and by starting save $20 per month, you will have it paid off in a couple of years.  From there on it is money back in your pocket.