Tag:Tips
The Cache – Range Hood
 The Cache Range Hood by Zephyr provides some storage above the range in a sleek range hood. A good choice for a kitchen with limited space.
I picture it as good place for utensils and small cooking items such as spices though you might want to consider which spices to put in here. Some may be heat sensitive.
Linear Shower Drains
- FreeStyle Linear Drain
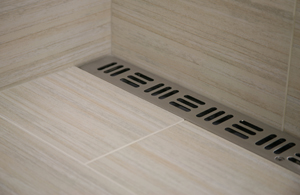
One of the problems with tile showers is how to handle the drain. The traditional drain which is centrally located functions well, but often causes problems with tile floors. The current trend towards larger tile has increased this problem. In order to slope the floor to the center drain, the installer generally resorts to multiple cuts creating an odd polygon pattern or worse, the shattered tile look. Alternatively some installers avoid the issue and leave the floor level causing puddles and standing water.
A new solution has presented itself with the installation of linear drains such as the FreeStyle Linear Drain by Noble Company. A linear drain is installed along one wall allowing an even cross slope to be installed draining the water to one side. Linear drains have been common in Europe, but have not been easily adapted to U.S. plumbing. Consider this solution when you’re looking at a tile shower.
Stud Finder Quote
“According to every stud finder I’ve tried to use, my walls contain a rapidly shifting network of hundreds and hundreds of studs.”
Manufactured Housing Remodels
Some of the manufactured housing companies from the 50’s and 60’s were ahead of the curve on green building. Many of them used panelization (prefabricated wall sections) for their wall construction. Interior, non-bearing walls were often constructed using 2×2’s in lieu of the standard 2×4’s. This resulted in space savings, but created non-standard door jambs and generally required 1-3/8″ door thicknesses. Electrical box installations are tight and these walls are not suitable for chases in most cases. The narrow walls and narrow door jambs were followed by smaller than average casings, base and other associated trim.
There are many of these homes in the residential areas of Culver. I have no confirmations, but it is our understanding that most of these homes were purchased through National Homes out of Lafayette, Indiana. We were contracted to move a wall in one of these homes on Academy Road last month. This reminds us of a previous project completed on Fleet Parkway.
This project was a home purchased from a past client where we had completed several projects. The home was purchased by an Interior Designer and her family. She wanted to update the Master Bathroom, Guest Bathroom and Kitchen.

Along with this she wanted to change the existing trim throughout the house. She chose an oversized MDF trim for the casing and base which gave the walls more mass. This was added to all of the main floor rooms as well as the downstairs family room. We were able to collaborate with her on several methods of changing the trim such as the detail to the right (and the cap detail here) at the entrance to the dining room from the living room. This disguised one of the main openings where the narrow walls were obvious. The change was dramatic as you can see in these before and after pictures.
 We provided a custom window seat at the main window in the living room providing a focal point for the room. This made a dramatic change to that room. There was also a dated white wrought iron railing system at the stairs into the room which we changed to wood following the theme of increasing the scale of accent elements.
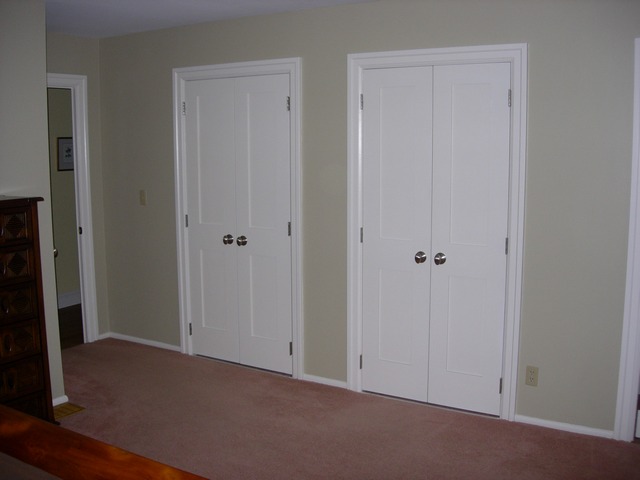 The existing doors were a hollow core wood with stained veneer finish. These were changed to two panel (stacked) composite doors which were painted white to match the trim. The composite doors are heavier which required some reinforcing of the jambs, but the added weight made the 1-3/8″ thickness less noticeable. New hardware further enhanced the substantial feeling. An example of this can be seen in the master bedroom closet doors in the picture to the right. (Notice the size of the existing baseboard which was retained in this room.)
 In the original floor plan, the master bathroom was small and was adjacent to a combination bathroom/laundry room that served the other two bedrooms. As part of the remodel, we expanded the master bathroom, stealing space from the laundry room. This expanded the master bath sufficiently to allow a separate shower and soaking tub (left). A furniture piece sink was used in this room. Tile floors were added with tile shower surrounds and a tile surround for the tub. Beadboard wainscot was added as well.
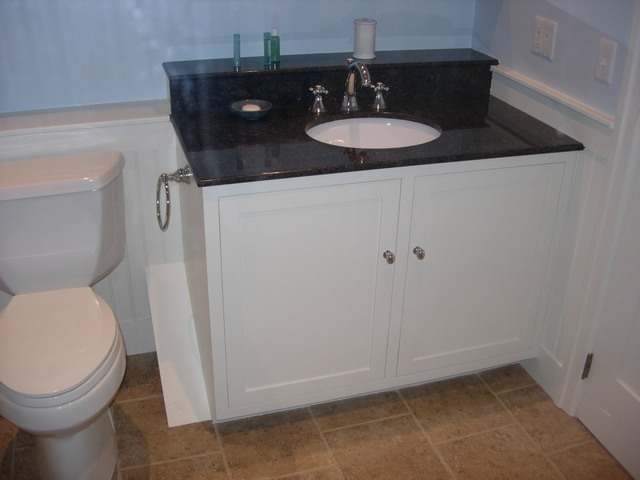 An existing closet was used to create a new guest bathroom to serve the other two bedrooms. This bath also included tile floors and wall details as well as similar beadboard wainscot. A custom cabinet was created to allow the sink to be installed over the area where the head space for the stairs to the basement encroached on this room. A tub-shower was installed opposite the sink. Custom clear glass shower partitions and doors were included in both rooms.
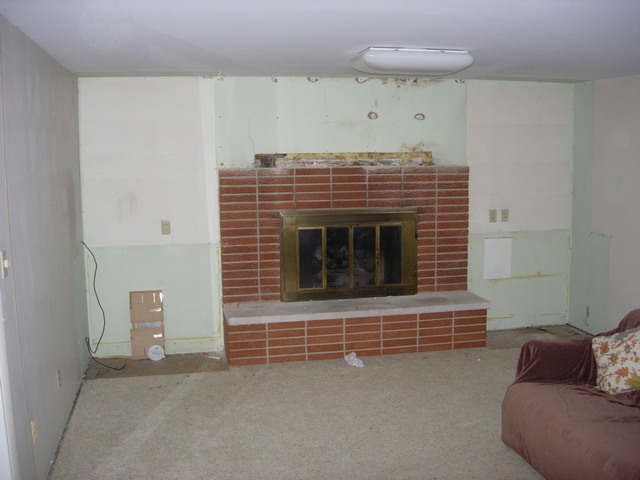
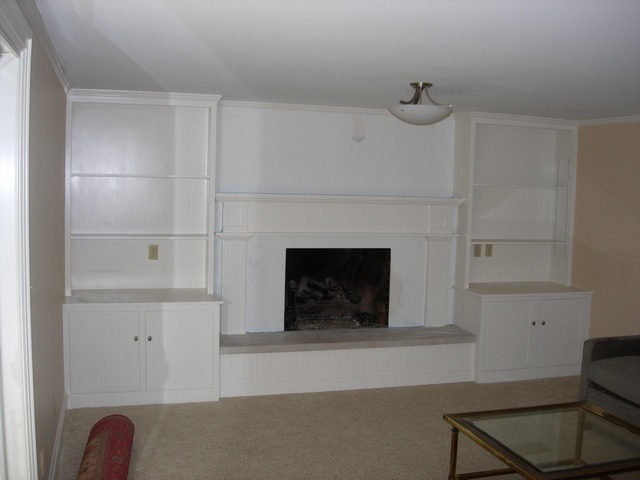
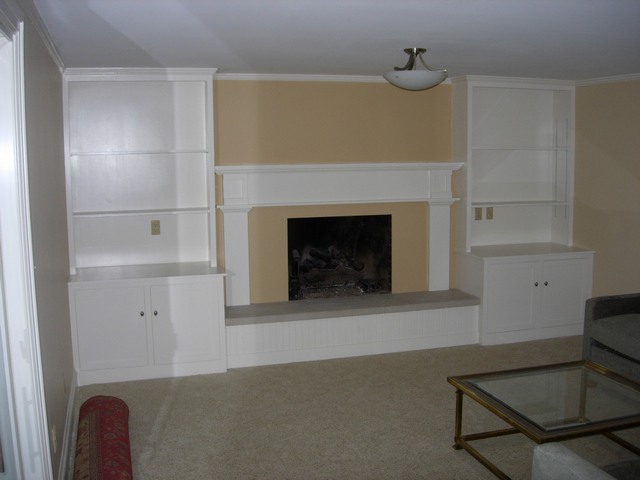
We also provided a custom cabinetry fireplace surround in the family room. The old cabinetry was removed and replaced with custom sizes. The red brick fireplace was covered in drywall and wood refreshing its appearance. The stained shelves were removed and reconstructed with the larger trim, recessed shelf strips, and custom shelves to match the cabinetry below. (See pictures below.)
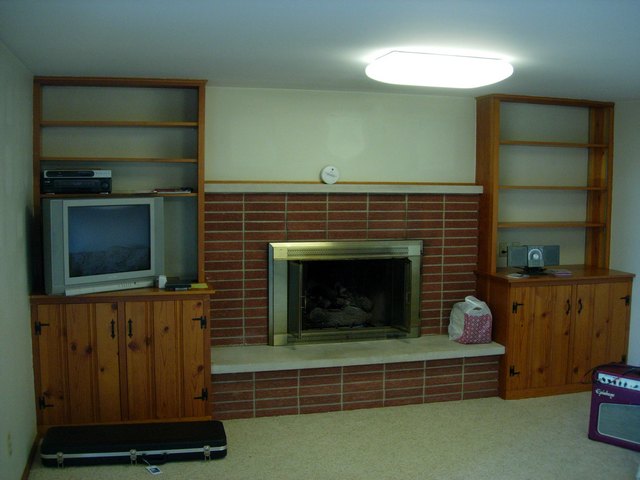
Fireplace (Before)
Fireplace Stripped
DF Fireplace During 2
DF Fireplace Painted

DF Fireplace (After)
It was quite amazing what these changes did to transform the home. We are pleased and proud that we were allowed to be part of this project.
Linear Shower Drains
- FreeStyle Linear Drain
One of the problems with tile showers is how to handle the drain. The traditional drain which is centrally located functions well, but often causes problems with tile floors. The current trend towards larger tile has increased this problem. In order to slope the floor to the center drain, the installer generally resorts to multiple cuts creating an odd polygon pattern or worse, the shattered tile look. Alternatively some installers avoid the issue and leave the floor level causing puddles and standing water.
A new solution has presented itself with the installation of linear drains such as the FreeStyle Linear Drain by Noble Company. A linear drain is installed along one wall allowing an even cross slope to be installed draining the water to one side. Linear drains have been common in Europe, but have not been easily adapted to U.S. plumbing. Consider this solution when you’re looking at a tile shower.
Stud Finder Quote
“According to every stud finder I’ve tried to use, my walls contain a rapidly shifting network of hundreds and hundreds of studs.”
Manufactured Housing Remodels
Some of the manufactured housing companies from the 50’s and 60’s were ahead of the curve on green building. Many of them used panelization (prefabricated wall sections) for their wall construction. Interior, non-bearing walls were often constructed using 2×2’s in lieu of the standard 2×4’s. This resulted in space savings, but created non-standard door jambs and generally required 1-3/8″ door thicknesses. Electrical box installations are tight and these walls are not suitable for chases in most cases. The narrow walls and narrow door jambs were followed by smaller than average casings, base and other associated trim.
There are many of these homes in the residential areas of Culver. I have no confirmations, but it is our understanding that most of these homes were purchased through National Homes out of Lafayette, Indiana. We were contracted to move a wall in one of these homes on Academy Road last month. This reminds us of a previous project completed on Fleet Parkway.
This project was a home purchased from a past client where we had completed several projects. The home was purchased by an Interior Designer and her family. She wanted to update the Master Bathroom, Guest Bathroom and Kitchen.
Along with this she wanted to change the existing trim throughout the house. She chose an oversized MDF trim for the casing and base which gave the walls more mass. This was added to all of the main floor rooms as well as the downstairs family room. We were able to collaborate with her on several methods of changing the trim such as the detail to the right (and the cap detail here) at the entrance to the dining room from the living room. This disguised one of the main openings where the narrow walls were obvious. The change was dramatic as you can see in these before and after pictures.
We provided a custom window seat at the main window in the living room providing a focal point for the room. This made a dramatic change to that room. There was also a dated white wrought iron railing system at the stairs into the room which we changed to wood following the theme of increasing the scale of accent elements.
The existing doors were a hollow core wood with stained veneer finish. These were changed to two panel (stacked) composite doors which were painted white to match the trim. The composite doors are heavier which required some reinforcing of the jambs, but the added weight made the 1-3/8″ thickness less noticeable. New hardware further enhanced the substantial feeling. An example of this can be seen in the master bedroom closet doors in the picture to the right. (Notice the size of the existing baseboard which was retained in this room.)
In the original floor plan, the master bathroom was small and was adjacent to a combination bathroom/laundry room that served the other two bedrooms. As part of the remodel, we expanded the master bathroom, stealing space from the laundry room. This expanded the master bath sufficiently to allow a separate shower and soaking tub (left). A furniture piece sink was used in this room. Tile floors were added with tile shower surrounds and a tile surround for the tub. Beadboard wainscot was added as well.
An existing closet was used to create a new guest bathroom to serve the other two bedrooms. This bath also included tile floors and wall details as well as similar beadboard wainscot. A custom cabinet was created to allow the sink to be installed over the area where the head space for the stairs to the basement encroached on this room. A tub-shower was installed opposite the sink. Custom clear glass shower partitions and doors were included in both rooms.
We also provided a custom cabinetry fireplace surround in the family room. The old cabinetry was removed and replaced with custom sizes. The red brick fireplace was covered in drywall and wood refreshing its appearance. The stained shelves were removed and reconstructed with the larger trim, recessed shelf strips, and custom shelves to match the cabinetry below. (See pictures below.)
Fireplace (Before)
Fireplace Stripped
DF Fireplace During 2
DF Fireplace Painted
DF Fireplace (After)
It was quite amazing what these changes did to transform the home. We are pleased and proud that we were allowed to be part of this project.
My Visit with Alan Steele of SBDC

Alan Steel
Marshall County Economic Development Corporation (MCEDC) has made arrangements with the Small Business Development Center (SBDC) to have Alan Steele come to the MCEDC office in Plymouth once each month to council existing Marshall County businesses and future entrepreneurs. The service has been offered for most of 2011 and has been reasonably well received with 16 businesses taking advantage of the service through September.
Earlier this month I decided to take advantage of the service myself regarding a business venture I am considering outside Easterday Construction Co., Inc. While I had some ideas of what I wanted to do, I knew there were gaps in my knowledge, since this would be a move into a new arena for me. I also felt that it was appropriate that I go through the experience with Mr. Steele since as Chair of MCEDC, I have been promoting the service to others.
The meeting was quite productive. The questions he asked were pertinent and thought provoking. At the end he explained several options for additional information he could obtain for me. I received the additional information within about 10 days. I would recommend the service for anyone that is considering a new business, expanding an existing business or just needing help with their current business. I think this is a seriously underutilized resource.
